/
How to Set Up and Integrate with Stripe (take card payments)
You are browsing myClubhouse Knowledge Base
How to Set Up and Integrate with Stripe (take card payments)
- Matthew Shovelton
- Joanne Shovelton
- Peter Hickson
Owned by Matthew Shovelton
This article details what you need to do to link a Stripe merchant account to myClubhouse so that you can use Stripe to accept credit and debit card payments. Stripe is a cost-effective alternative to PayPal; they typically charge 1.5% + 20p per transaction (+ 0.5% for recurring payments). Details can be found here: https://stripe.com/gb.
Step-by-step guide
- The first step is to create a merchant account on Stripe, if you haven't done so already. Go to https://stripe.com/gb and click the "Start now" button; then follow the instructions.
Note: Several clients have selected Business Type "Non-profit" and hit a stumbling block (e.g. Company Number); upon speaking to a Stripe representative, they have been told that non-profit organisations should select "Individual/Sole Trader" if they can't complete all the required fields for "Non-profit". - Once you have your merchant account in place you need to retrieve the public and secret keys for your account:
- Login to your Stripe dashboard.
- Make sure the "Test mode" option (in the top-right) is off (it should be coloured grey, not orange).
- Click "Developers" in the top-right.
- Select the "API keys" tab
- In the "Standard keys" section, you will see two API keys listed: "Publishable key" and "Secret key" (you need to press a button to reveal the Secret key).
- In a new browser window or tab, go to your myClubhouse site and log in as somebody with administrative access.
- Add a new Stripe payment method:
- In the main menu, select Admin > Finance > Manage Payment Methods.
- Click the green "Add Method ..." button. You will see the following popup
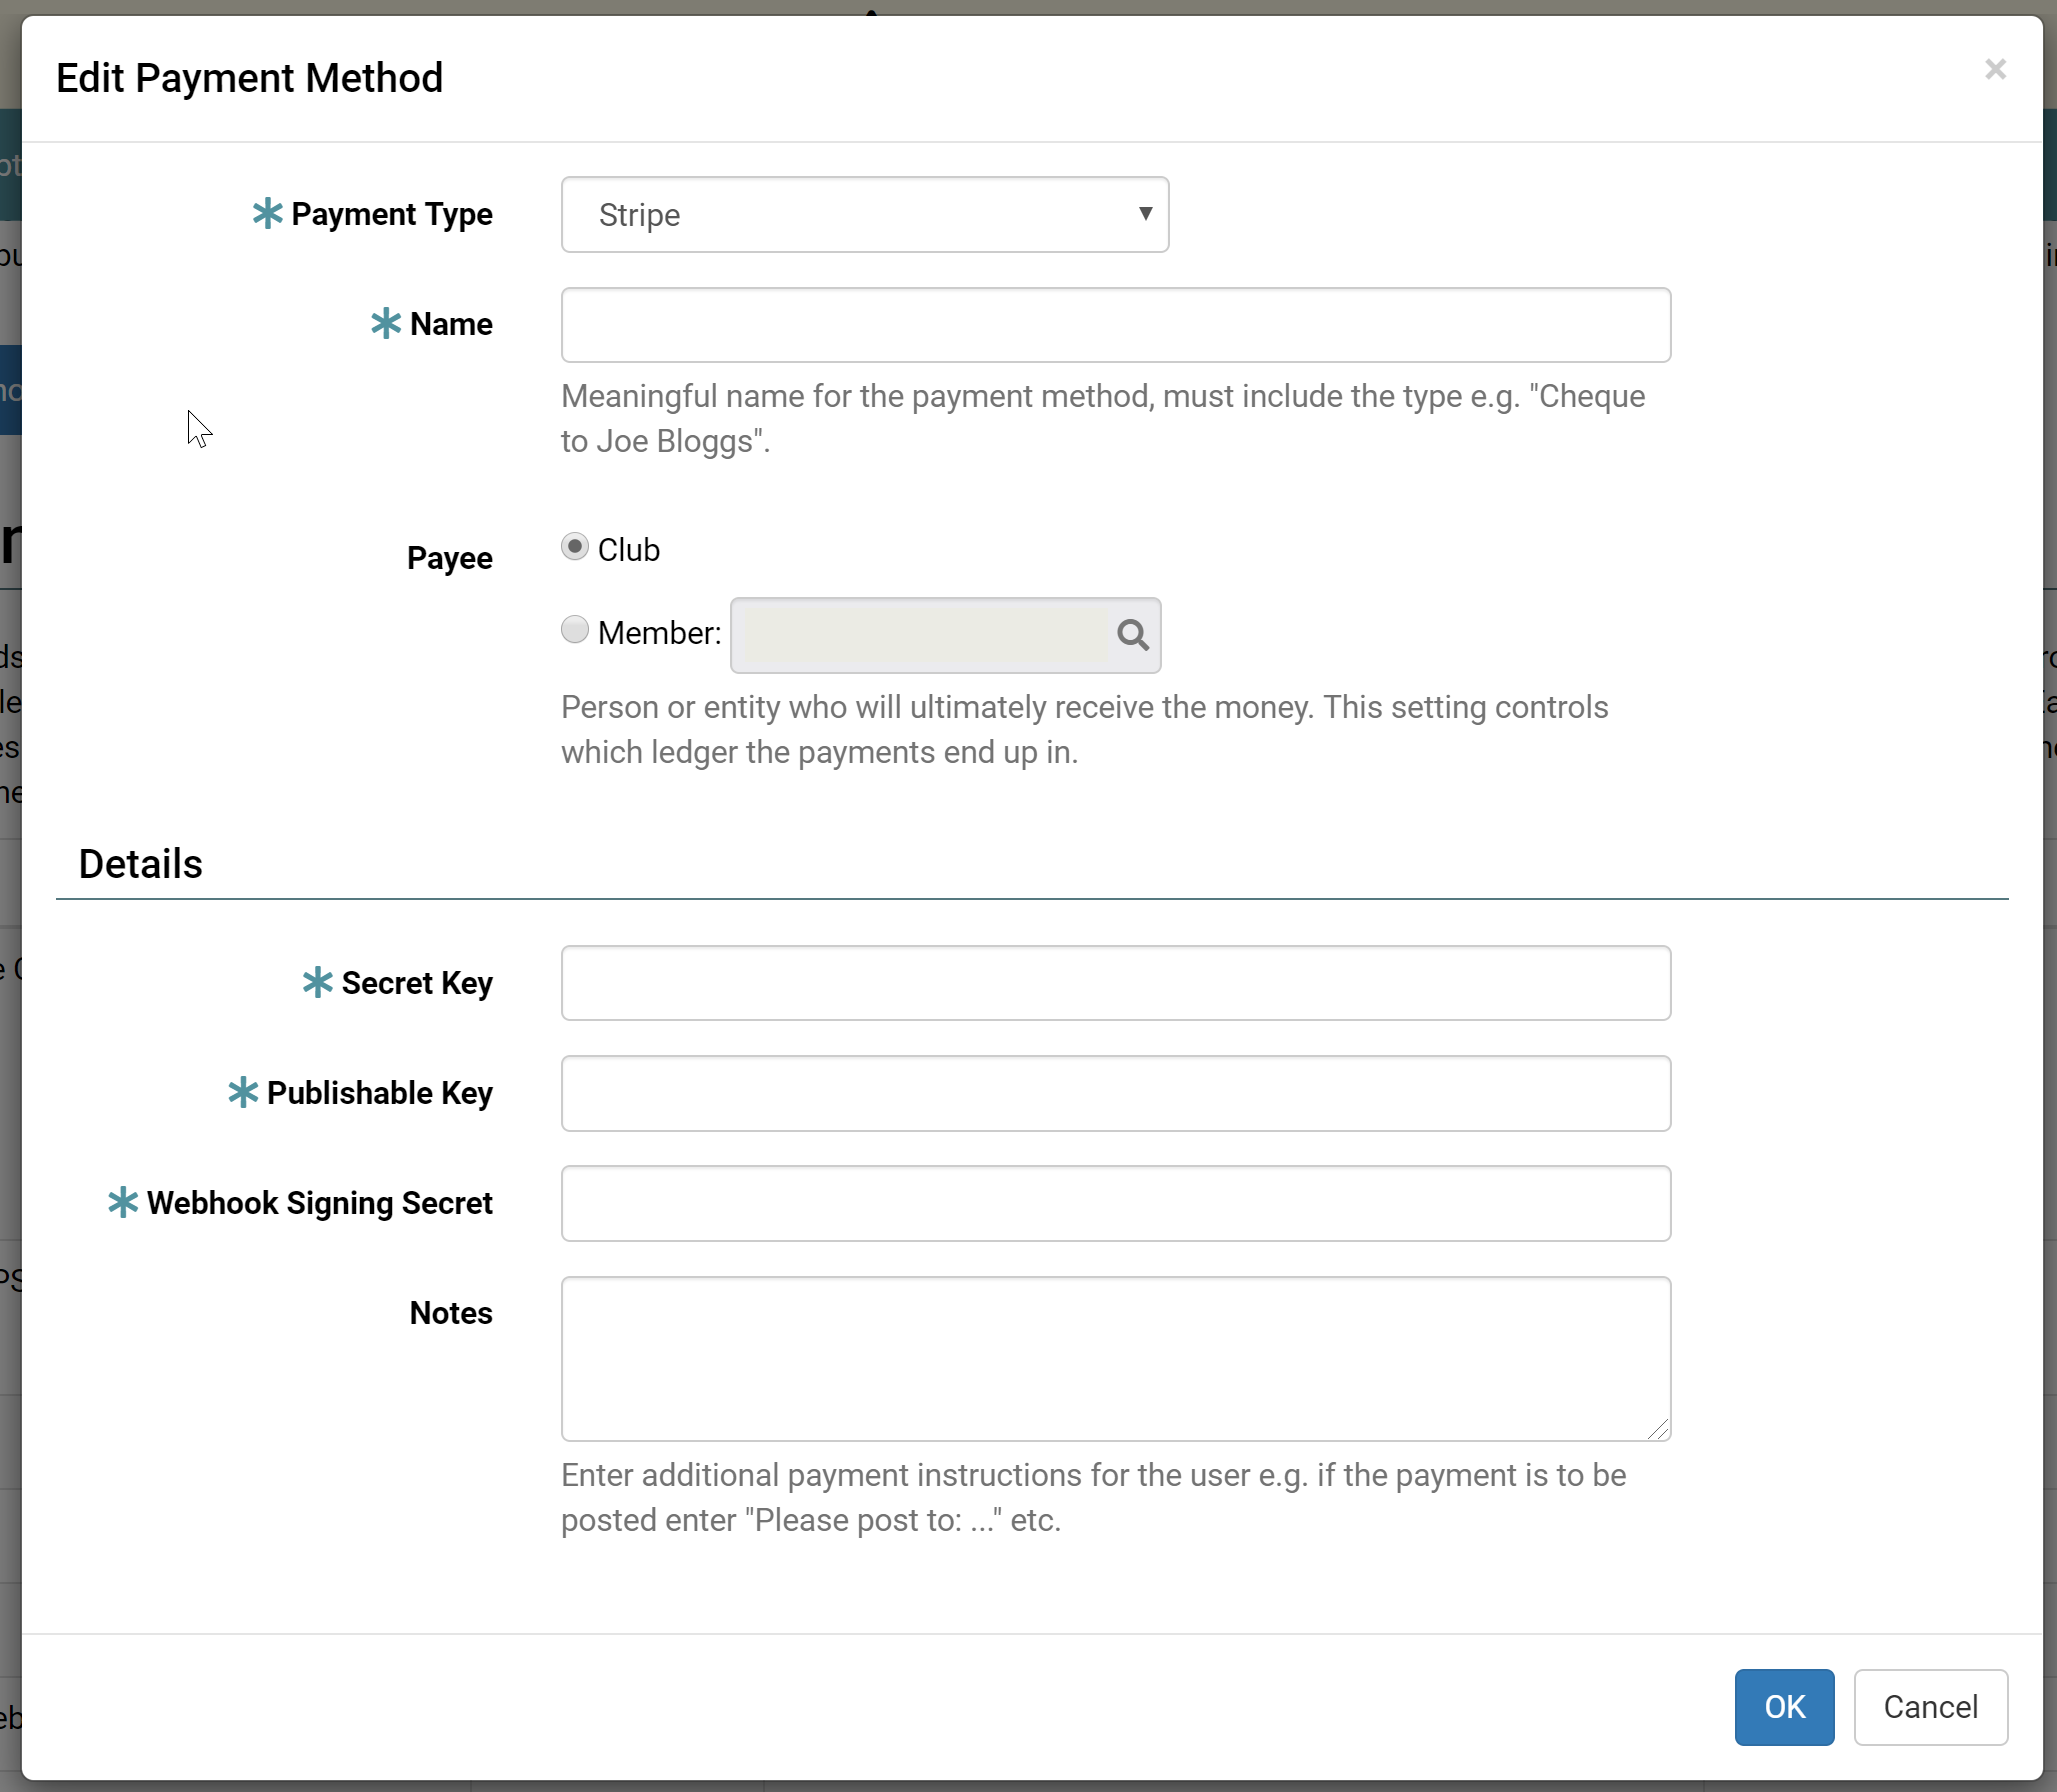
- Set the "Payment Type" to "Stripe".
- Set the "Name" to be "Stripe" - you can call it whatever you want, but for the club's main Stripe payment method, you should simply call it "Stripe".
- Copy the Secret key from the Stripe merchant dashboard into the "Secret key" field.
- Copy the Publishable key from the Stripe merchant dashboard into the "Publishable Key" field.
- Leave the Webhook Signing Secret field blank for now.
- Leave the "Payee Member" field blank.
- Click OK.
- Your new payment method will now be listed in the displayed payment methods table. Make a note of its numeric ID (displayed in the first column of this table).
- The final step is to set up the Stripe "webhook". The webhook allows Stripe to send messages directly to myClubhouse when certain post-transaction events occur. For example, if you issue a refund through the Stripe dashboard, then the webhook allows Stripe to communicate this information to myClubhouse which can then update automatically.
- In myClubhouse, click the "Check Webhook" button:

- You will get an error message indicating that the webhook has not been configured correctly.
- Click the green "Fix" button that now appears.
- This should now indicate success. If there are any errors, double-check that the secret and publishable keys are correct.
- In myClubhouse, click the "Check Webhook" button:
Related articles
, multiple selections available,
Related content
Stripe/GoCardless/PayPal Transaction Fees
Stripe/GoCardless/PayPal Transaction Fees
More like this
How to Set Up and Integrate with PayPal (take payments)
How to Set Up and Integrate with PayPal (take payments)
More like this
How to Set Up and Integrate with GoCardless (take direct debit payments)
How to Set Up and Integrate with GoCardless (take direct debit payments)
More like this
How to Enter a Payment
How to Enter a Payment
More like this
Payment Methods, Plans, and Schemes
Payment Methods, Plans, and Schemes
More like this
Adding a GoCardless Mandate
Adding a GoCardless Mandate
More like this