You are browsing myClubhouse Knowledge Base
Customise the Home Page
- Joanne Shovelton
For site administrators: How to edit and modify the Home Page.
Step-by-step guide
Almost every area of the Home Page can be customised by site administrators, although the basic layout remains fixed. For details on how to customise each area, please follow the links below:
- Site Styles and Colours (applies to all pages)
- Header and Footer (applies to all pages)
- Image Carousel
- Large Link Buttons
- Home Page Custom Sections 1, 2 & 3
Site Styles and Colours
The site styles and colours apply to all pages of your site.
- Sign in to your myClubhouse site with administrator-level priviledges and navigate to Admin > Settings > Site Styles & Colours.
- First of all, select your two main site colours. The main site colours should be strong, saturated colours. For any of the web site elements listed below you can choose lighter or darker shades of these two colours.
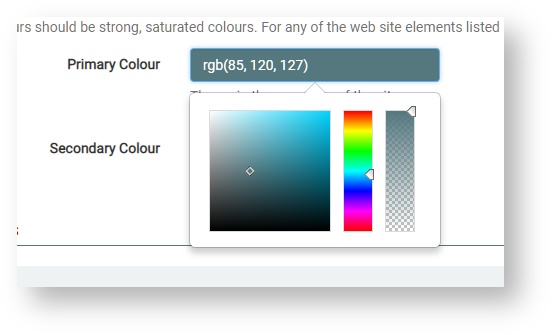
When selecting any colour, you can enter the colour as RGB (denoted by rgb(xxx,xxx,xxx)), hexidecimal (denoted by #xxxxxx) or by draging the indicators on the pop-out graphic as shown. - Once the Primary and Secondary colours have been selected, the rest of the colours will be selected automatically. You can override any of these colours by selecting either a lighter or darker shade (from the first option):
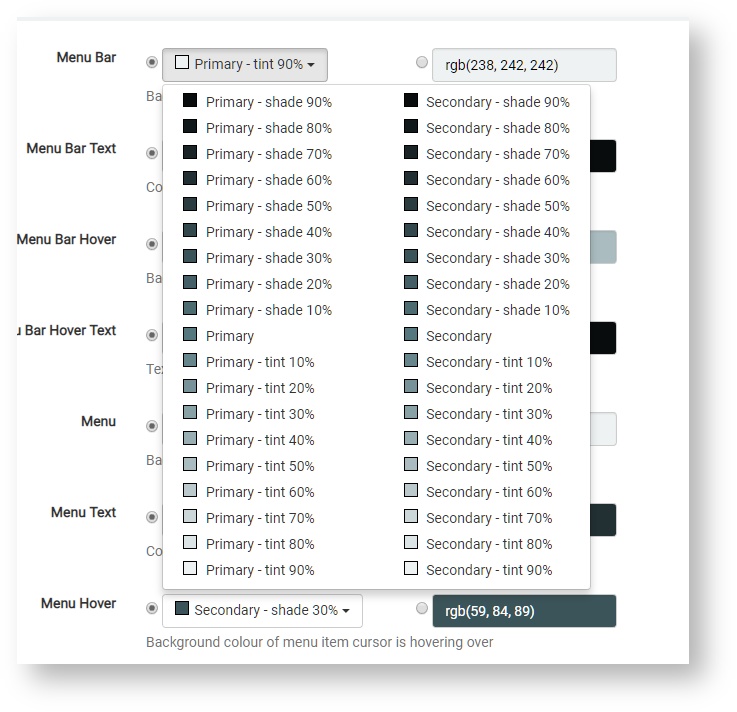
or by selecting a completely new colour (from the second option):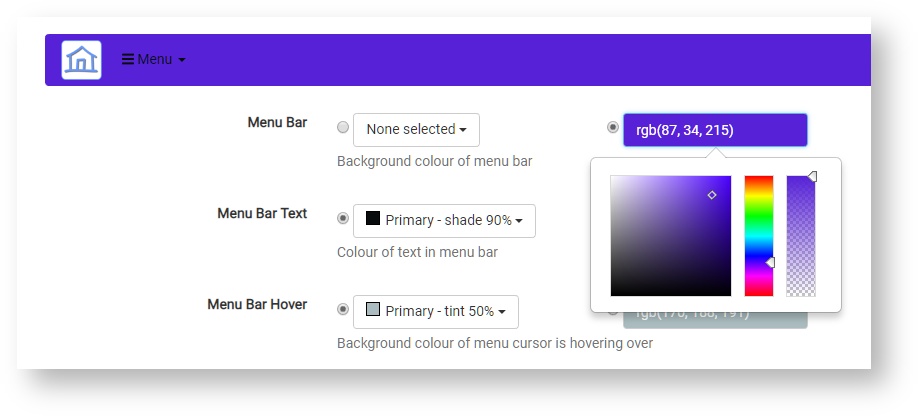
A preview of element in question is displayed immediately. - Scroll to the bottom of the page and click Save Changes. You will then need to refresh the page to see the changes.
Header and Footer
The header and footer appear on all pages of your site for all users.
- Sign in to your myClubhouse site with administrator-level priviledges and navigate to Admin > Settings > Configure Site Images
- The header and footer can each contain up to two images which can also be clickable links.
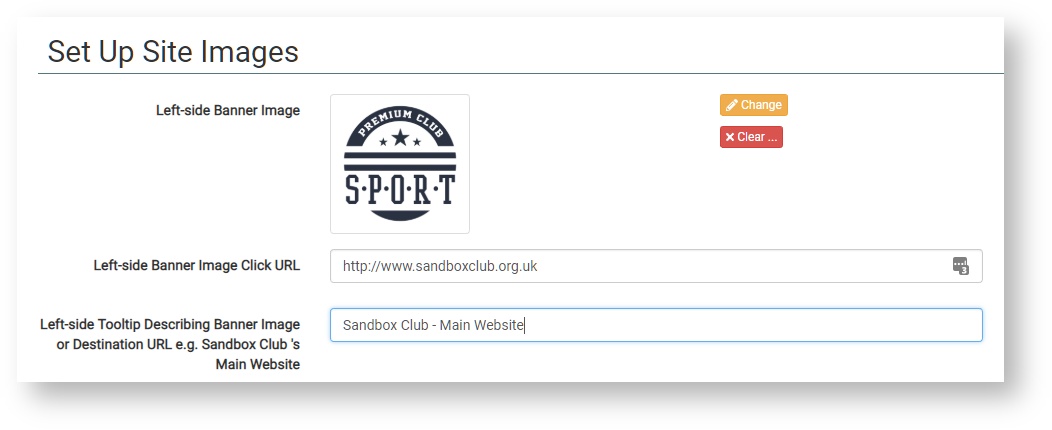
- Left-side Bannder Image: this is traditionally your club's logo, but can be anything you wish.
- Click the yellow 'Change' button to upload a new image, the Image Upload pop-up appears.
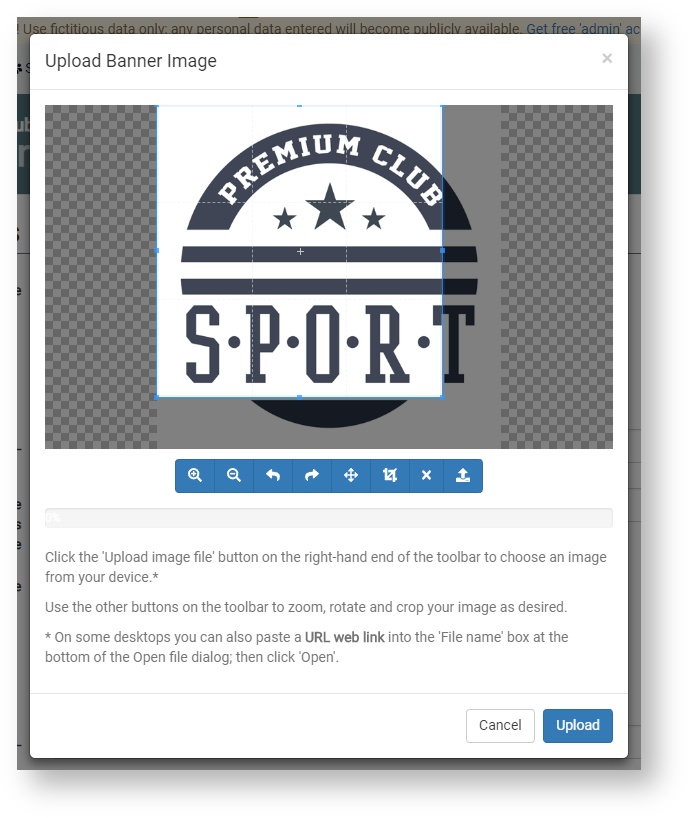
Click the button on the right-hand end of the blue toolbar to select and upload a new image. Use the other buttons on the toolbar to zoom, crop and rotate the image. The aspect ration is not fixed, but all images will be displayed with a height of 80 pixels on desktop devices. When you are happy with the size and position of your image, click the blue Upload button.The image is uploaded and saved immediately. - If you wish for the image to link to a particular website or web page when clicked, enter the URL.
- Finally, enter some text about the image or the URL destination.This text will be displayed as a tooltip when a desktop user hovers their cursor over it.
- Changes are saved automatically.
- Click the yellow 'Change' button to upload a new image, the Image Upload pop-up appears.
- Right-side Banner Image: this works exactly the same as the left-side banner image but is displayed on the right-hand side of the header.
- Similarly, the left and right footer images are displayed on the left and right-hand sides of the footer at the bottom of every page.
- Changes are all saved automatically on this page.
Mobile Displays
The site images will be displayed according to the screen size. For example, on standard-sized tablets, the right-hand header image may not be displayed in portrait mode, but the left-hand header image and both footer images will be shown. On most phone screens, the eader and footer images will all be hidden.
Image Carousel
The image carousel is a show-case for your organisation. It can show images of your members, your activities, your premises, advertise upcoming events, display important notices, advertise sponsors etc. Each image in the carousel can contain additional text and can also be a clickable link, so it can link to another page on your site (an event page in the calendar, for example). What's more - different images can be displayed to different visitors! So, fore example, you could showcase the club and show membership offers to the public and logged-in non-members, but for logged-in members you could promote upcoming events. Each image has a time-frame so you can only show it at the relevant time. The possibilities are endless!
- Sign in to your myClubhouse site with administrator-level priviledges and stay on the Home Page.
- If you have any carousel images showing, click the 'Configure' button in the bottom left corner of the image.
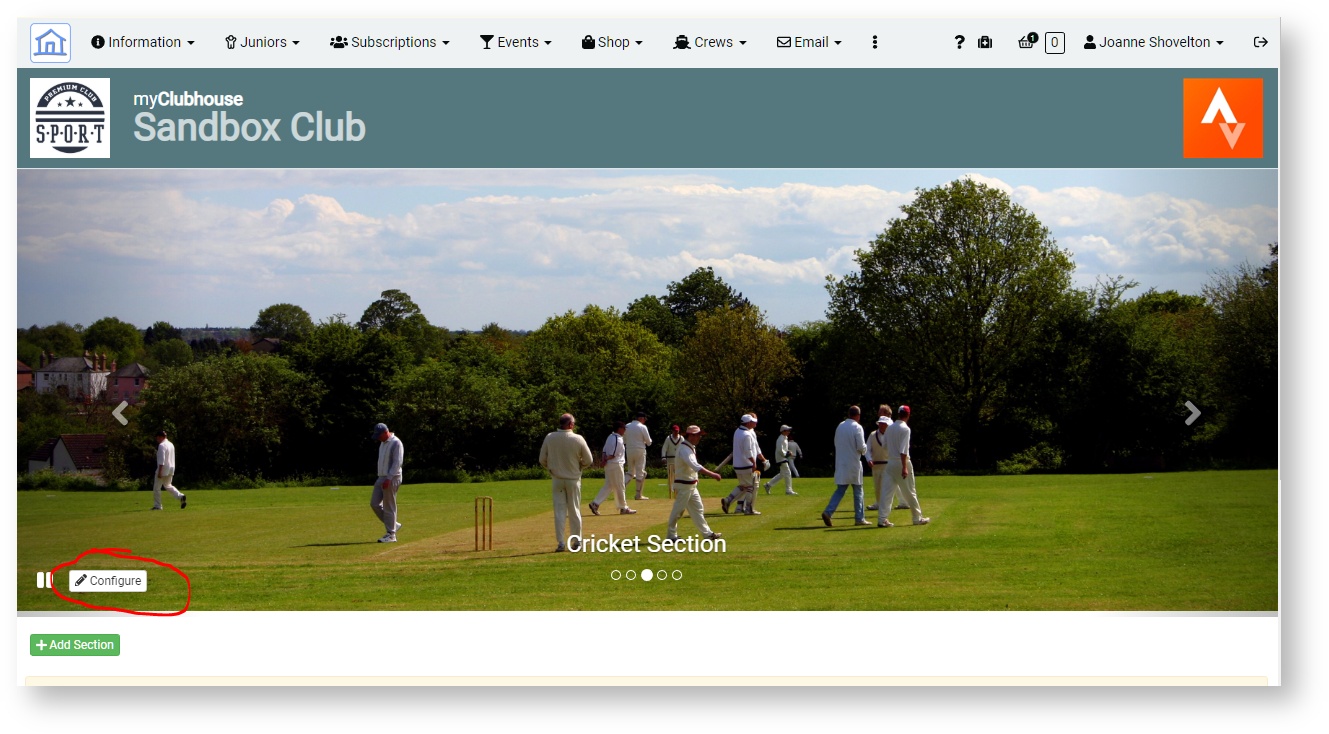
If you do not have any images displayed, navigate to Admin > Page Customisation > Configure Carousel. - On the Configure Carousel page, click the green 'Add Item ...' button from the top right, the image pop-up appears.
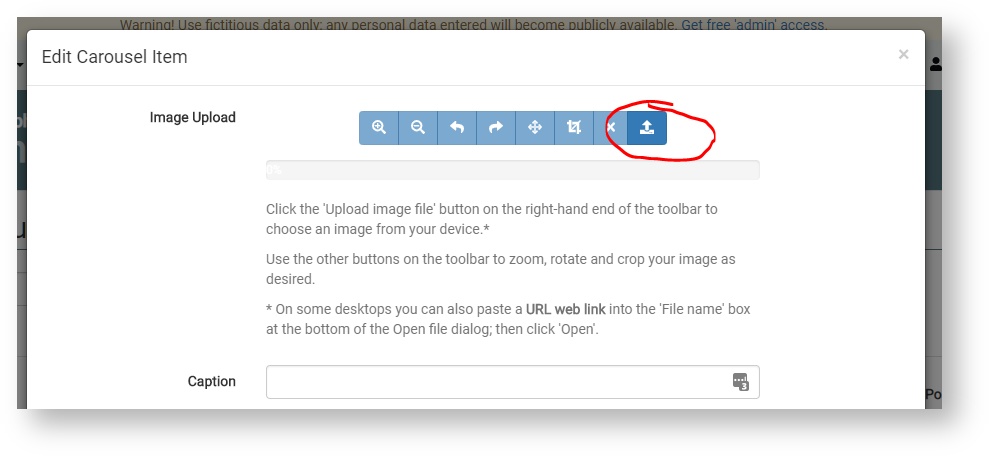
- Image Upload
 Click the 'Upload image file' button on the right-hand end of the toolbar to choose an image from your device.*
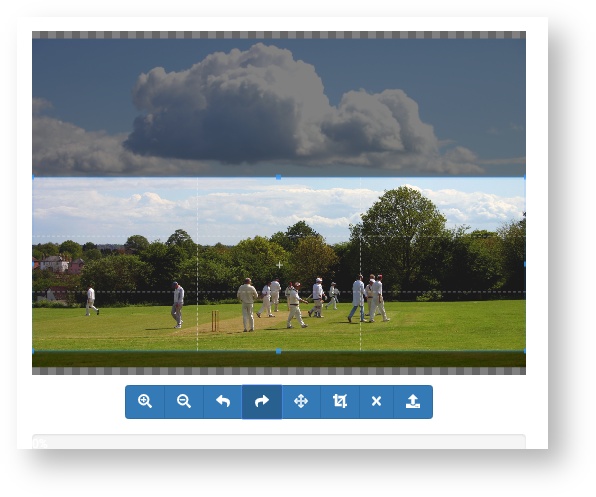 On some desktops you can also paste aURL web linkinto the 'File name' box at the bottom of the Open file dialog; then click 'Open'.
Copyright Laws
You must always be sure that you own the copyright to the images you display on your myClubhouse site. Simmetrics Ltd is not responsible for the content of your site and it is your responsibility to ensure you do not infringe any copyright laws.
Looking for free stock images to fill your carousel? Try pixabay.com or www.pexels.com.
Once your image has uploaded, you can use the other buttons on the toolbar to zoom, rotate and crop your image as desired.Carousel Image Aspect Ratio
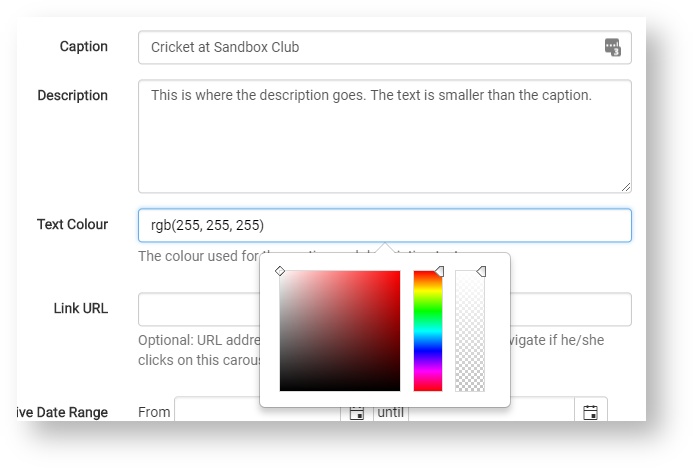
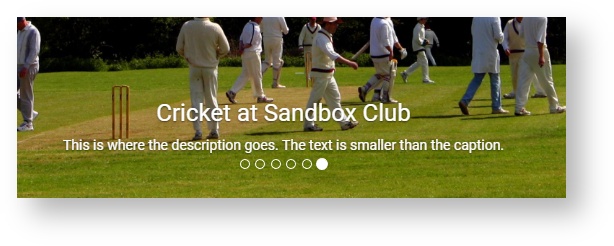
All images are cropped to an aspect ratio of 1000 x 355. You may find it useful to prepare your images to this aspect ratio before uploading, to ensure they will look their best. Images will be displayed across the full width of the viewer's browser window, so the higher the size and resolution, the better. - Caption - optional caption text for your image. This will be displayed at the bottom of the image.
- Description - optonal text to be displayed underneath the Caption, in a smaller font.
- Text Colour - select a text colour to display your Caption and Description, this should contrast with the background colour of your image. You can enter the colour as RGB (denoted by rgb(xxx,xxx,xxx)), hexidecimal (denoted by #xxxxxx) or by draging the indicators on the pop-out graphic as shown. The text will be displayed with a subtle drop shadow.
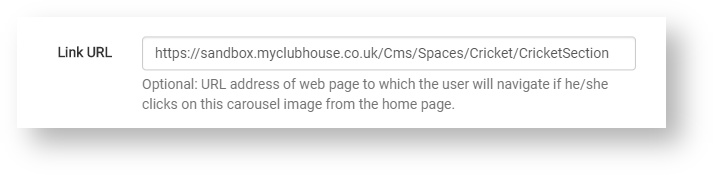
- Link URL - optional. Enter the address of the web page where the visitor will be taken when they click on the carousel image. This can be a page on your myClubhouse site or any other page on the web. If you are using the image to advertise membership to non-members, you may take them to the registration page, or for an event you may take them to the sign-up page.
- Active Date Range - option, for time-sensitive images e.g. advertising an event or a special offer. The date limits allow you to prepare images in advance, knowing they will automatically start displaying during the active window and stop when no longer relevant. You can leave either or both limits open. Enter dates by typing in the box or click on the calendar icon to select:
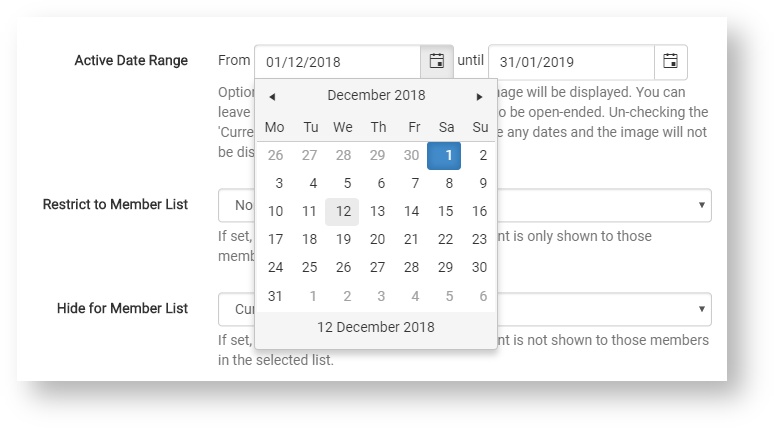
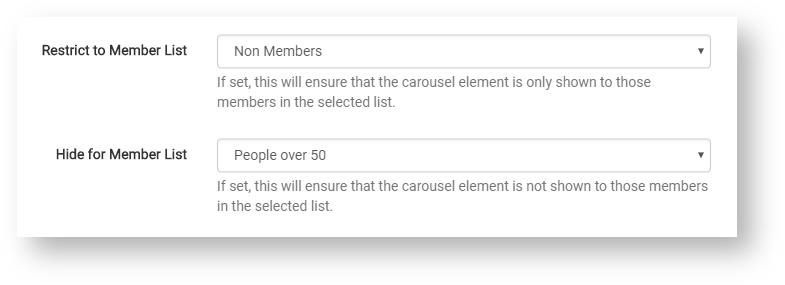
Restrict to Member List - this is a very powerful tool. Select a particular member list and the image will only be displayed to members of that list. The default is "Everyone".
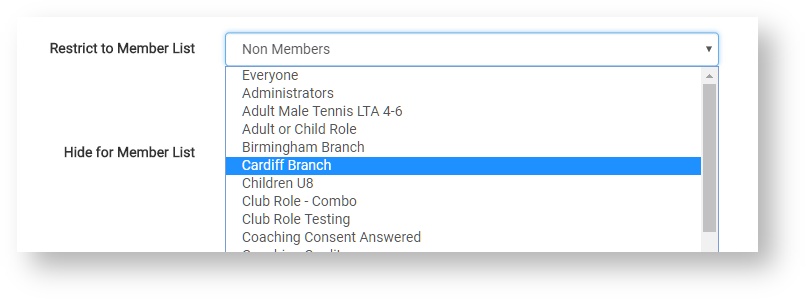
Member Lists
Our Member Lists engine is an extremely powerful tool with a multitude of uses throughout the site. Member Lists group users based on almost any criteria from the database e.g. age, membership category, gender, answers to form questions, events attended etc. They can be used for email distribution lists, csv export, assigning site permissions, restricting access to web pages, events etc. etc! They are live dynamic lists run in real-time, so will always be up-to-date at the moment when they are used. This is particularly useful for time-sentitve queries such as age or membership status.
- Hide for Member List - again, this helps you to narrow down the people that will see the image. It will only be shown to those who are in the 'Restrict to Member List' and not in the 'Hide for Member List'. For visitors that are not logged in, only those images selected for "Everyone" will be displayed.
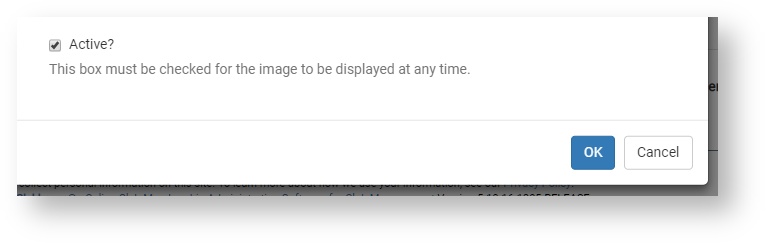
- Active? - use this checkbox to switch the image on and off without the need to delete.
- Click OK when you have set up your carousel image.
- Once you have saved your image, it will be displayed on the table.
- Use the up and down arrows to change the order in which the images are shown to the visitor.
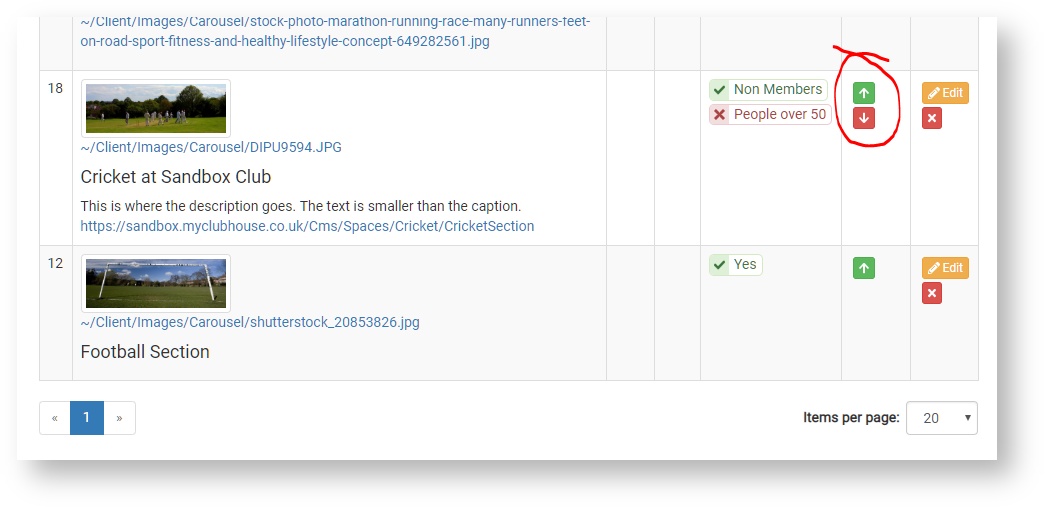
- Use the Edit button to bring back the pop-up editor
 .
. - Use the red 'X' button to Delete the carousel image
 .
.
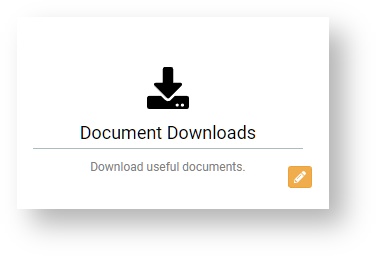
Large Link Buttons
Large link buttons are displayed on the Home Page under the carousel. You can configure which link buttons and shown and to whom. There is no limit to the number fo large link buttons, but we recommend no more than four.
- Sign in to your myClubhouse site with administrator-level priviledges and stay on the Home Page.
- Scroll down to the link buttons and hover your cursor over them, a yellow edit button will appear on the right hand side. Click the yellow edit button.
If you are on a mobile device or do not see the yellow edit button, navigate to Admin > Page Customisation > Configure Home Page Links. The page is arranged by Role. The default is "Users that are not logged in" and if no other Roles are configured, then everyone will see the links shown under that category.
Club Roles
Club Roles can be set up by administrators from Admin > Settings > Club Roles.
- To configure links for a different Role, select the role from the drop-down list and then click the green 'Configure' button. A new area will appear for that Role.
- Users who are logged in will see the links selected for the highest-level role to which they belong e.g. if they are an Adult Member but also a Committee Member, they will see the links configured for Committee Members.
- Click the green 'Add' button
 next to your Role of choice, to set up a new link.
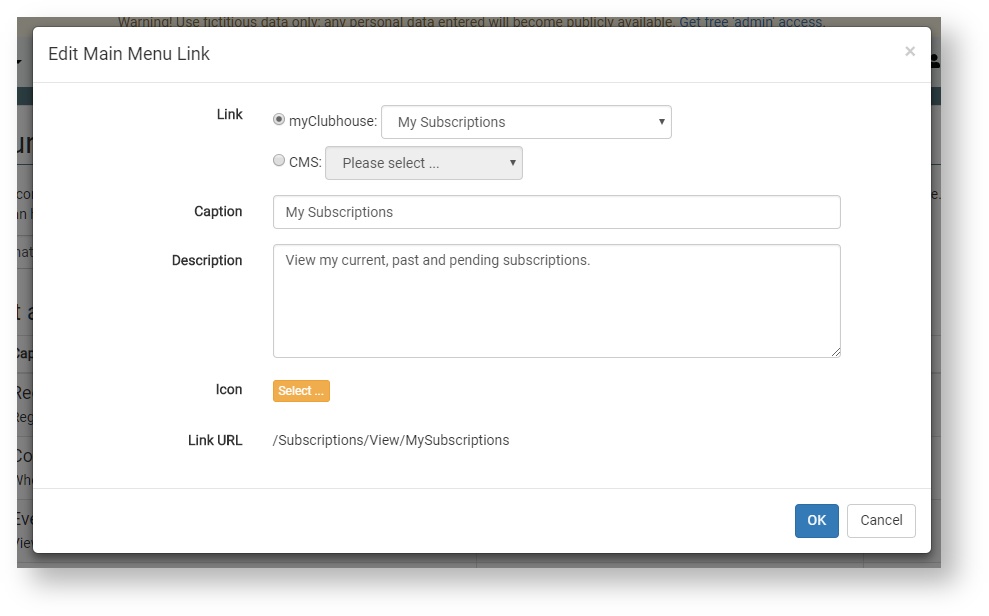
- You can select a link to one of the built-in myClubhouse pages or one of your own CMS pages. Select your link destination from one of these drop-down lists.
- Caption - by default the Caption will display the Page Title, but you can change this if you wish.

- Description - by default the Description will display the built-in description for the page, but you can change this if you wish.
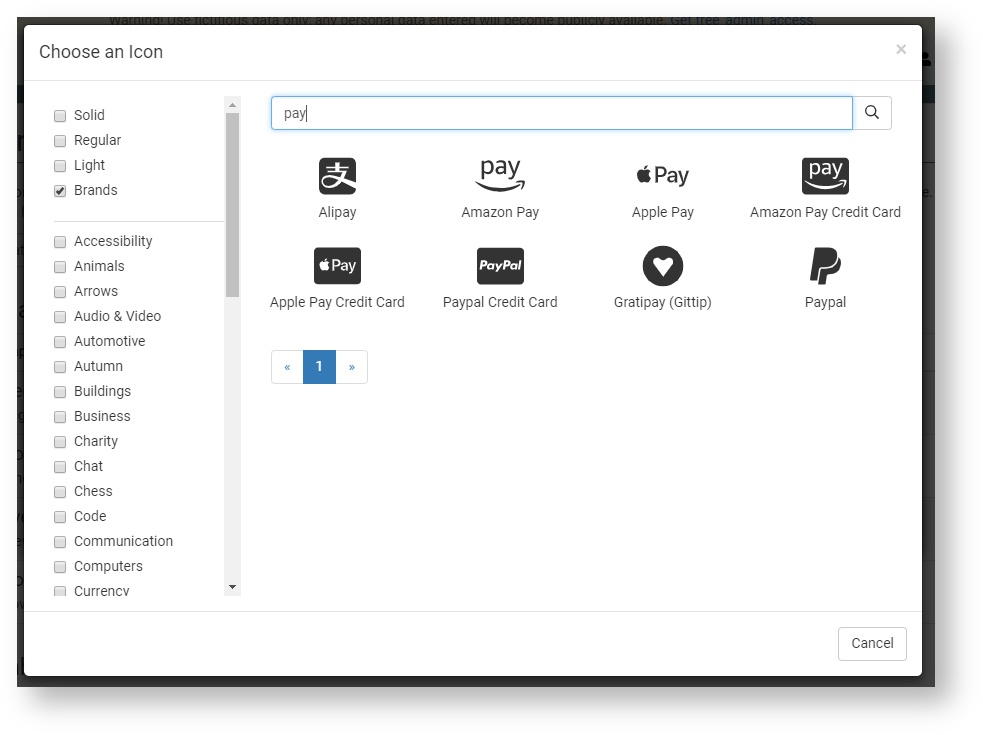
- Icon - click the yellow 'Select' button to choose an icon from the Font Awesome collection. There is a search box at the top and categories on the left to help you find something suitable.
- Once you have made all your selections, click OK.
- Your link is added to the list for your selected Role.
- You can re-order the display of the links using the up and down arrow buttons on the table.

- To modify a link, click the yellow edit button
 and the pop-up editor will appear.
 - To delete a link, click the red 'X' button
 .
.
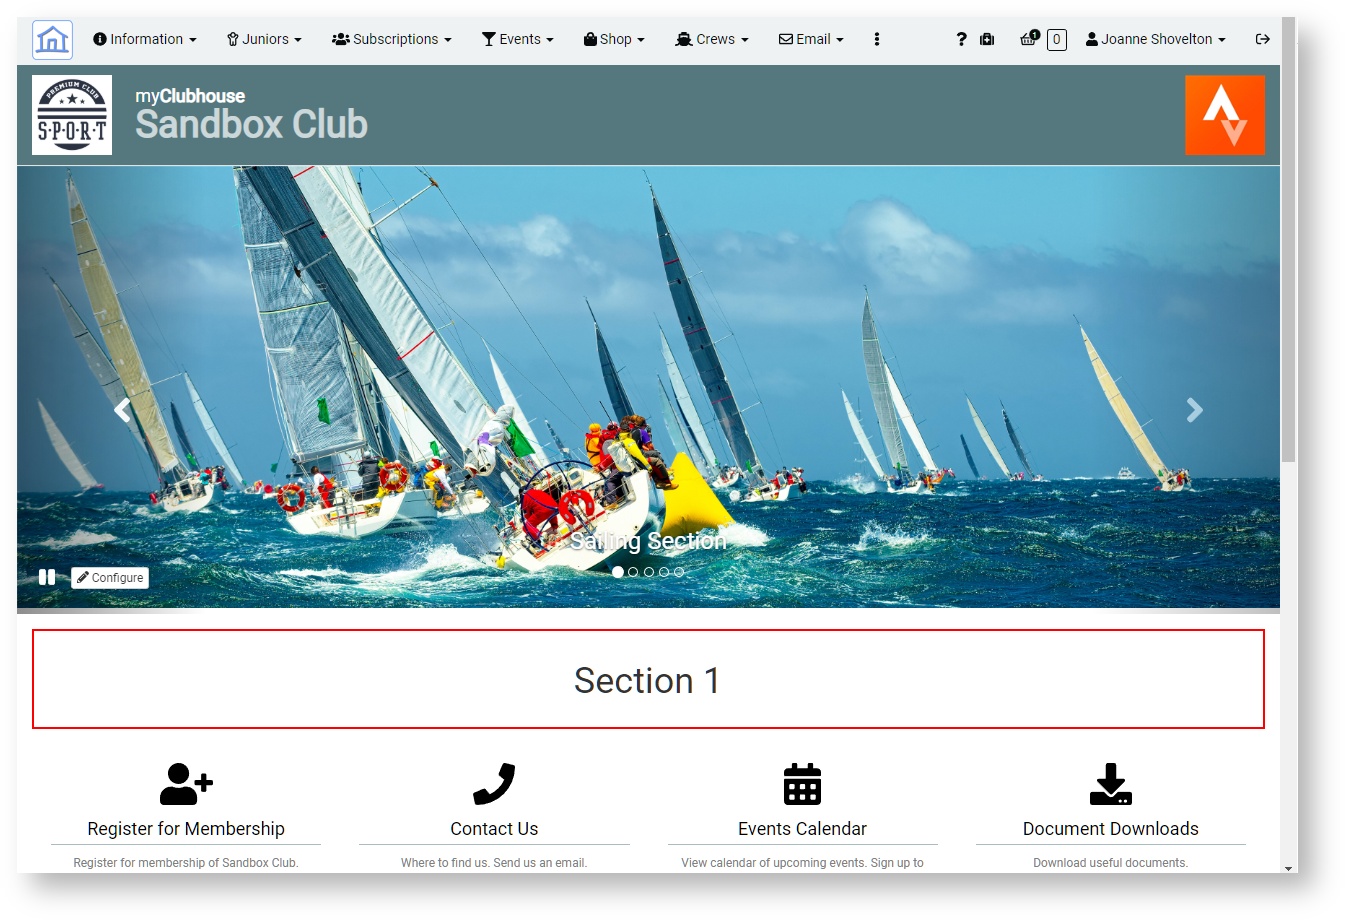
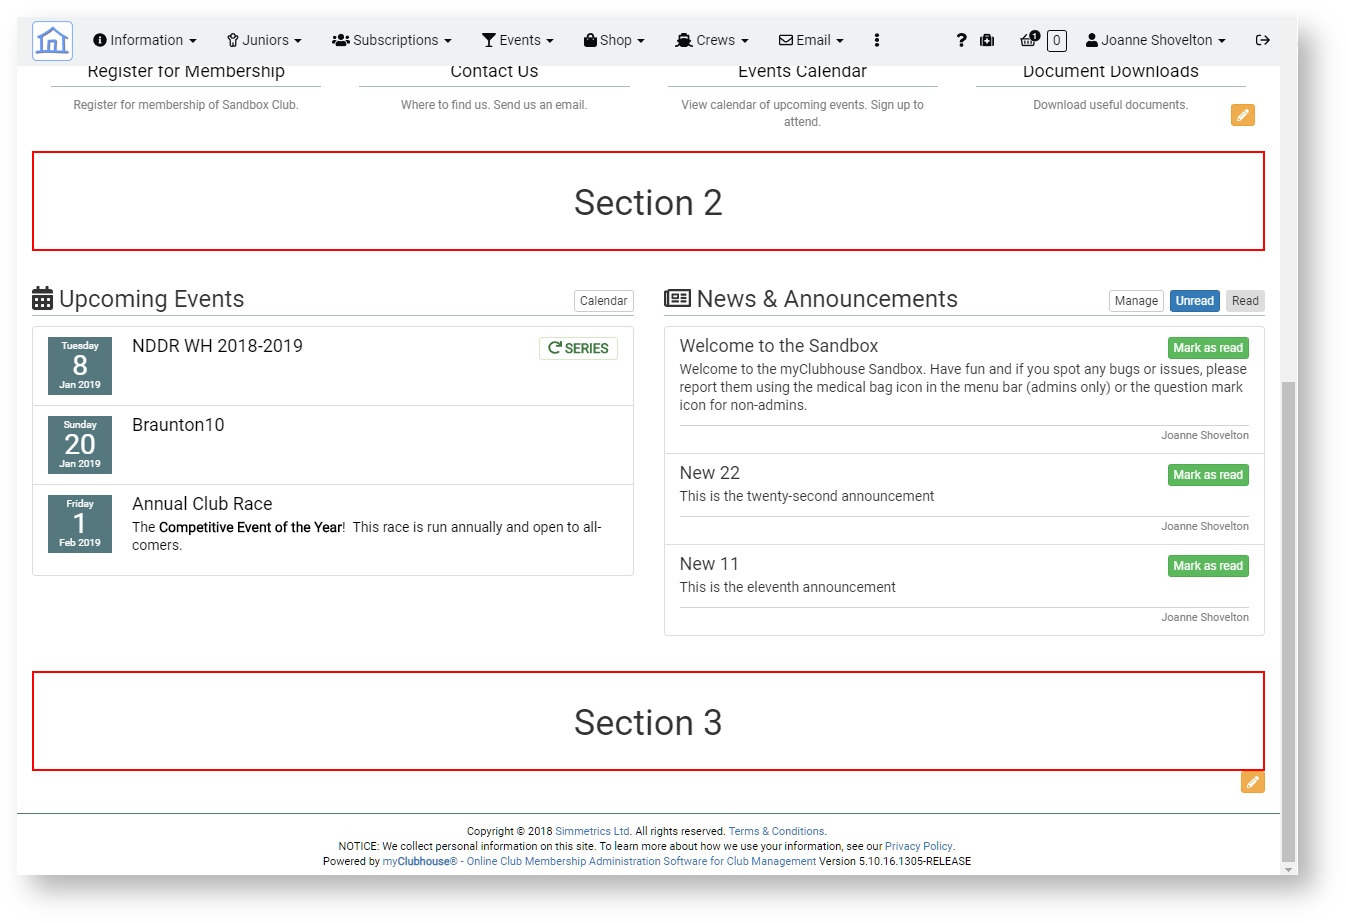
Home Page Custom Sections 1, 2 & 3
This page allows you to insert custom text and HTML into your home page. There are three positions at which you can insert content:
- Section 1: Between the image carousel and the highlighted links
- Section 2: Between the highlighted links and the events/announcements
- Section 3: Between the events/announcements and the footer
- Sign in to your myClubhouse site with administrator-level priviledges and stay on the Home Page.
- The first custom section will be inserted beneath the image carousel, click the green Add Section button
 or, if you already have a custom section, hover your cursor over it and click the yellow edit button. If you cannot seet the button, navigate to Admin > Page Customisation > Customise Home Page.
 - Scroll down the page to the section you wish to modify. Use the WYSIWYG html editor to add your own content.
If you know HTML and want to have more control over your design, click the left-hand buton in the toolbar
 to edit the HTML code directly.
You can use css style classes from Bootstrap 3 or add your own styles in the HTML. For more details on Bootsrap styles and responsive design, visit https://getbootstrap.com/docs/3.3/getting-started/.
- It is essential to use responsive web design on any custom sections, to ensure your home page will look great on mobile devices and tablets.
- Once you have finished adding your content, check the 'Enable' box and scroll to the bottom of the page to Save Changes.
View your home page to see how it looks, don't forget to check it on mobiles and tablets too! You will need to pay particular attention to any images and tables you may have added; they need careful styling to become responsive.
Tutorial
Want to improve your responsive web design? Try this Bootstrap 3 Tutorial. myClubhouse uses the Bootstrap 3 Grid System.
Related articles