You are browsing myClubhouse Knowledge Base
How to Set Up and Integrate with PayPal (take payments)
- Matthew Shovelton
- Joanne Shovelton
- Peter Hickson
This article describes how to set up myClubhouse to accept payments from PayPal. Note that this applies to versions of myClubhouse from 5.3.x onwards and describes the process for integrating with PayPal Express Checkout. The article assumes that you already have a PayPal merchant account set up.
Step-by-step guide
- In a new browser window or tab, go to your myClubhouse site and login as somebody with administrative access.
- Add a new PayPal payment method:
- In the main menu, select Admin > Finance > Manage Payment Methods.
Click the green "Add Method ..." button (or Edit your existing PayPal method). You will see the following popup: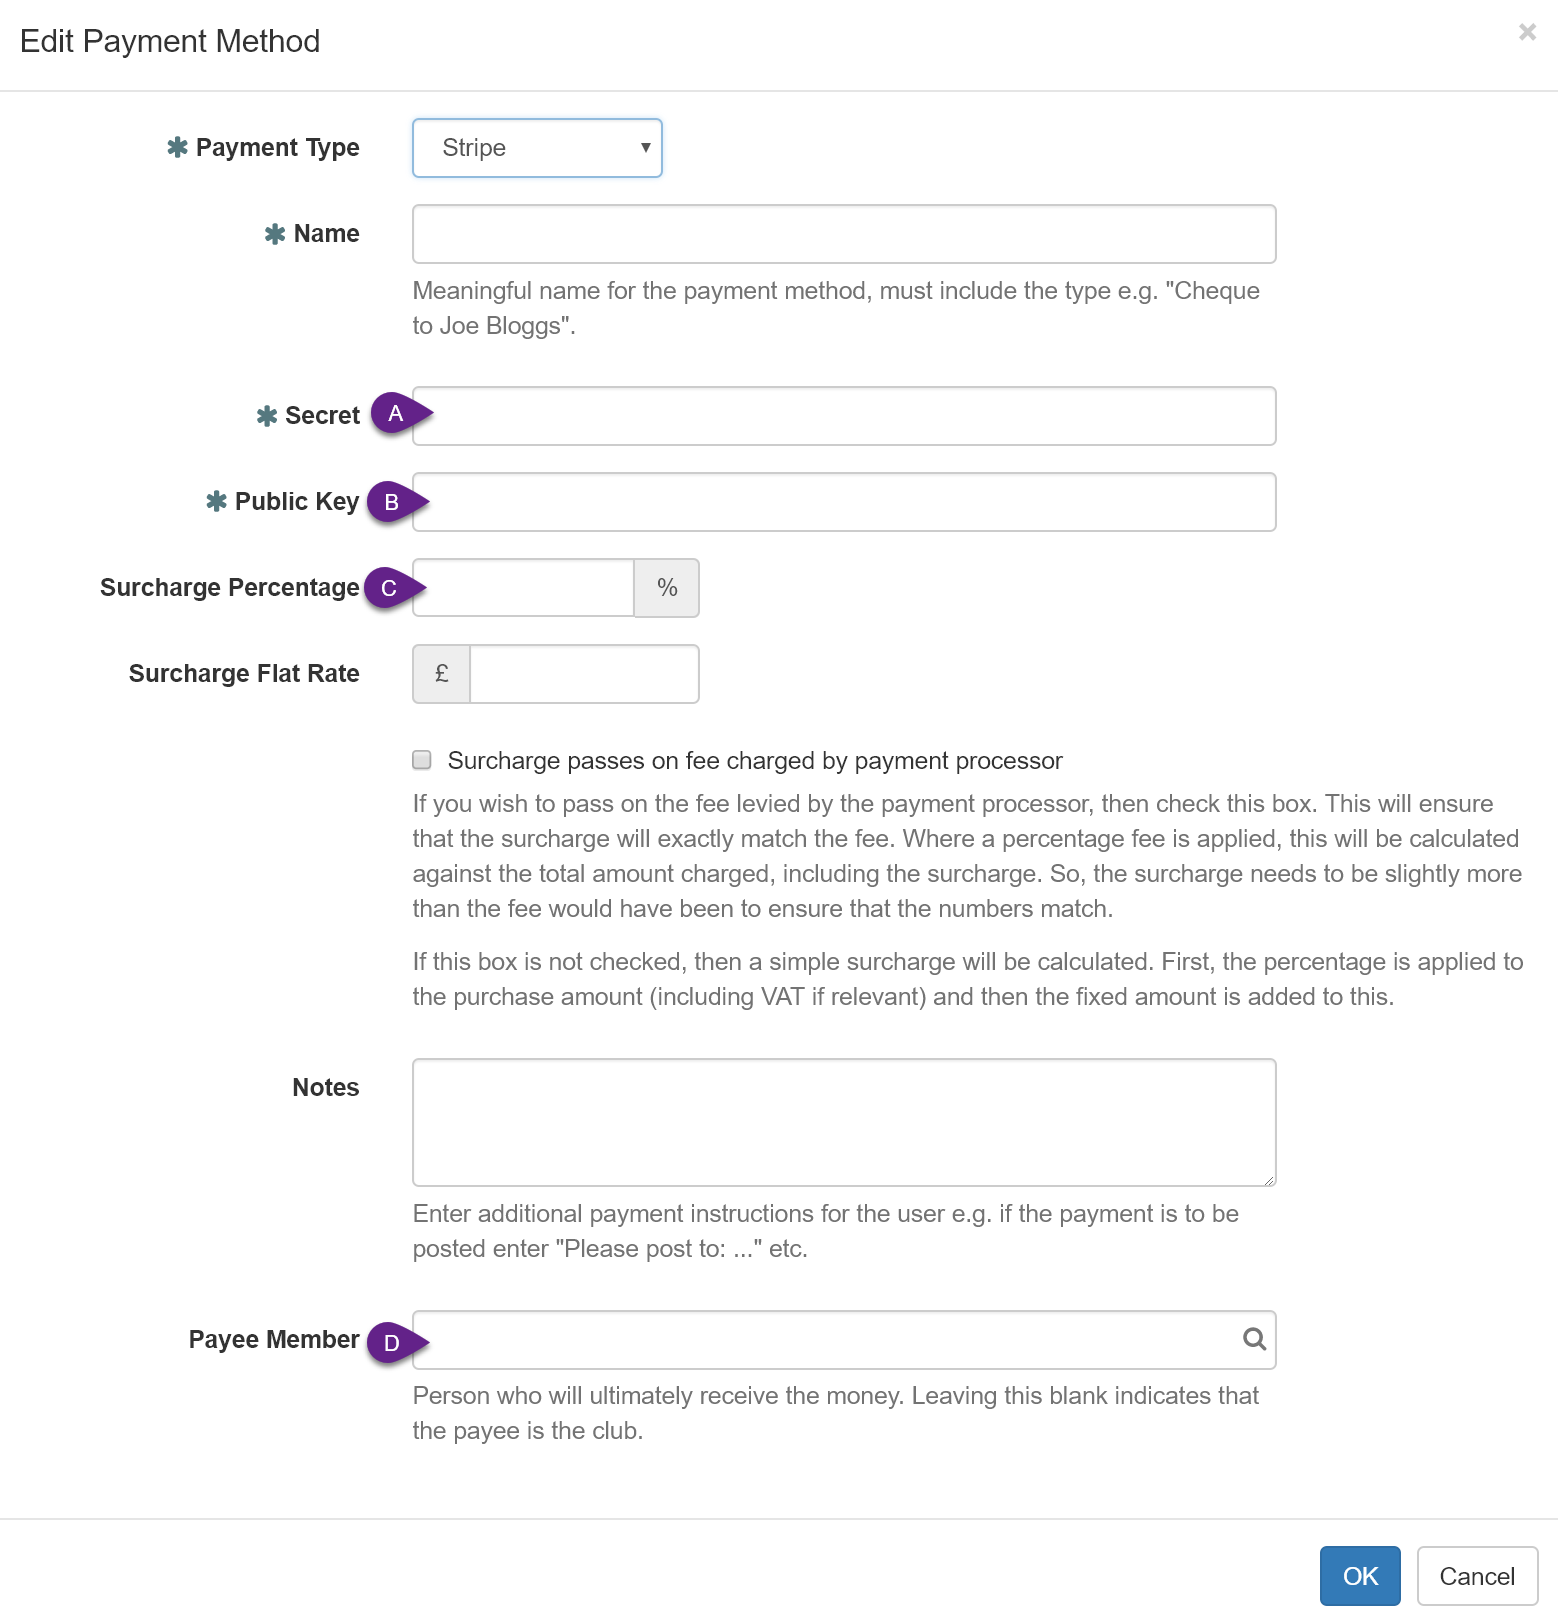
- Set "Payment type" to be "PayPal".
- Enter any email address as both the Merchant Email and Primary Email (we will come back to this later).
- Enter anything in the Secret, Client ID and Webhook ID fields for now (we come back to these later).
- Check the box "Sandbox Account"
- Click OK.
- In the main menu, select Admin > Finance > Manage Payment Methods.
- Set up a PayPal Sandbox application:
- In a new browser window or tab, navigate to the PayPal Developer home page: https://developer.paypal.com.
- Click the "Log into Dashboard" button in the top-right.
- Log in with your PayPal merchant account.
- You should find yourself on the "My Apps & Credentials" page.
- On the left-hand panel click "Accounts" under the Sandbox section.
- PayPal will have set up a default Business Sandbox account (test merchant account) and a default Personal Sandbox account (test customer account).
- You may wish to set up some other sandbox accounts for testing, you can do so here.
- In the left-hand panel, click on "My Apps & Credentials" under the Dashboard section. Make sure the switch is set to "Sandbox" and not "Live".
- Scroll down the page until you find the "REST API apps" section. Click "Create App".
- Set the "App Name" to "myClubhouse".
- Select the appropriate "Sandbox developer account" from the drop-down (this will be one of the business accounts from step 3e above).
- Click "Create App". You will now be taken to a page containing the details of the created app. You should see:
- Sandbox account
- Client ID
- Secret
- Scroll down to Sandbox Webhooks
- Click "Add Webhook"
- Switch back to your myClubhouse site browser tab and copy the Webhook URL from your new PayPal payment method, it will be something like: https://<<yourdomain.com>>/Finance/PayPal/Notify?paymentMethodID=##, there is a copy button to help you do this.
- Switch back to PayPal and paste the Webhook Url into the form.
- Under Event types check "All events".
- Scroll down to the bottom of the Sandbox Webhooks section and click "Save".
- Scroll back to the top of the page and note the "Sandbox account" email address
- Note the "Client ID".
- Under "Secret" click "Show". Note the "Secret" value displayed in the table.
- Under Sandbox Webhooks, note the "Webhook ID".
- Switch back to your myClubhouse site browser tab
- Click Edit against the PayPal payment method you created in Step 2 above.
- Enter the "Sandbox account" email address you noted in Step 3.l. above as both the Merchant Email and Primary Email.
- Copy the secret you noted in step 3.n. above, into the "Secret" field.
- Copy the Client ID you noted in step 3.m. above, into the "Client ID" field.
- Copy the Webhook ID you noted in step 3.o. above, into the Webhook ID field.
- Click OK.
- In the table of Payment Methods, click the "Check Webhook" button against the PayPal payment method. You should see a message "Webhook defined OK".
- Add your PayPal sandbox Payment Method to some Payment Schemes to test. Note: No real money will change hands when the PayPal sandbox account is used.
- Once you are happy that PayPal is working correctly, switch to a live account:
- Switch back to your PayPal developer account tab.
- Under My Apps & Credentials switch from "Sandbox" to "Live".
- Under "REST API apps" section, click "Create App".
- Set the "App Name" to "myClubhouse" and click "Create App".
- Note the "PayPal account" this should be your real PayPal merchant account email address.
- Note the Client ID.
- Note the Secret.
- In the Live Webhooks section click "Add Webhook".
- Use the same Webhook Url that you used for the sandbox. This can be found in your table of Payment Methods in myClubhouse.
- Under Event Types check All Events.
- Scroll to the bottom of the webhooks section and click "Save".
- Note the Webhook ID.
- Switch back to myClubhouse.
- Edit your PayPal payment method
- Change the settings to the live settings noted in step 6.e, 6.f, 6.g, and 6.l.
- Uncheck "Sandbox Account".
- Click OK.
- Click the question mark button to test the webhook settings. You should see a green message "Webhook defined ok".
- Add your live PayPal account to your Payment Schemes.
- You are now ready to start receving live payments via PayPal!
Whether you are using an existing PayPal account or have created a new one following this guide, duplicate invoice IDs can very occasionally crop up and cause issues. To alleviate this follow these steps:
Log in to paypal.com.
Hover over your name in the top right.
Click on "Account Settings".
Click on "Payment Preferences" on the left.
Click on "Update" next to "Block Payments".
Select "No, allow multiple payments per invoice ID" under the "Block accidental payments" section.
Related articles